Beginner's Path
-
Before you get started
Studio talk with Maya Clubine -
Pastel Paper with Maya Clubine
-
Making marks with Rebecca de MendonçaLimbering up
-
Broad energetic strokes
-
Smudging and Softening
-
Hatching
-
Twisting and turning
-
Combining techniques
-
Portraiture for Beginner's with Estelle RobinsonWhat makes a good reference photo?
-
Things to remember
-
Eyes
-
Things to Remember
-
Head Position
-
Things to Remember
-
Backgrounds
-
Things to remember
-
Drawing Children
-
Things to remember
-
Creating Texture in Hair
-
Things to remember
-
Seascapes with Tricia TaylorUnderpainting - Part 1
-
Underpainting - Part 2
-
Underpainting - Part 3
-
Wet Sand - Part 1
-
Wet Sand - Part 2
-
Wet Sand - Part 3
-
Wet Sand - Part 4
-
Beginner Wave - Part 1
-
Beginner Wave - Part 2
-
Beginner Wave - Part 3
-
Landscapes with Nina SquireDorset Dunes Colour Chart
-
Dorset Dunes Reference Images
-
Dorset Dunes Part 1
-
Dorset Dunes Part 2
-
Woody Walks Materials and images
-
Woody Walks Part 1
-
Woody Walks Part 2
-
Woody Walks Part 3
-
Woody Walks Part 4
-
Colour Theory with Tricia TaylorMixing Colour - Part 1
-
Mixing Colour - Part 2
-
How not to make mud
-
Creating Optical Illusions With Warm and Cool Colours, with Julie SwanCreating Optical Illusions With Warm and Cool Colours
-
Skies with Sandra OrmeSandra's Notes for Clouds
-
White Cloud Edges
-
Making Grey Clouds Interesting
-
Cloudburst Rain
-
Sandra's Notes for Sunset Skies
-
Sunset Sky - Stage 1
-
Sunset Sky - Stage 2
-
Sunset Sky - Stage 3
-
Boat Tutorial with Julie SwanBoat Tutorial
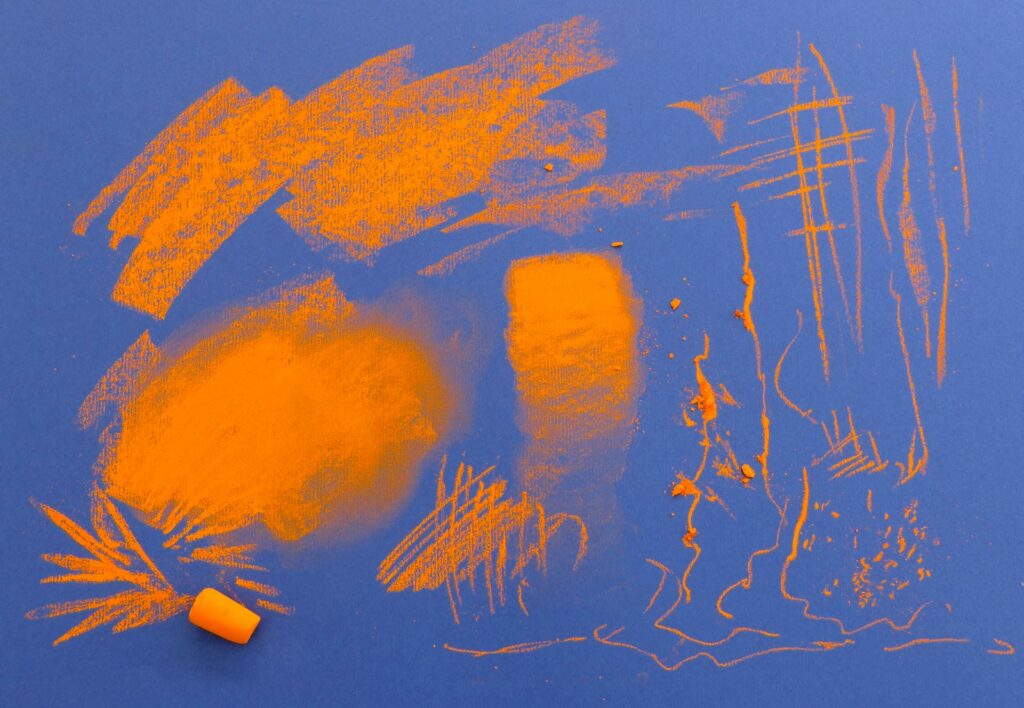
You can make lots of different marks with a pastel stick, especially if you take the label off. Then you can use the side, the end or the edge of it. You can break them in half unless you are working on a BIG piece of paper.
Time spent experimenting is worth its weight in gold. You can use the pastel stick on its side to make straight marks, or by twisting and turning it, or you can use it on its end to make little marks, dots and dashes. Vary the weight you apply. Try leaving the marks untouched in one area, and then blending and smudging in another. Notice the difference this makes.
Next, we’ll look at different techniques and marks individually. You can then combine these techniques in layers.
With all of the following techniques, try them with different amounts of pressure applied. By varying the pressure, you will really change the marks that you make…